
With all the new AI tools coming out, it can take time to determine which tool is best for you. We’re here with another honest and thorough review of one of these AI editing tools. Today we are looking at how to use Writesonic AI to write blog posts.
Check out our other AI platform reviews with ChatGPT, Lumen5, Jasper, Anyword, and Rytr to see how they compare.
Table of contents
- Step 1: Create Your Account to Use Writesonic AI to Write Blog Posts
- Step 2: Discover Writesonic AI Blog Tools
- Step 3: Choose your Blog Option
- Step 4: Use Blog Keywords
- Step 5: Utilize the Blog Writing Features
- Step 6: Generate Your Blog
- Step 7: Edit Your Blog
- Final Thoughts on using Writesonic AI to Write Your Blog Posts
Step 1: Create Your Account to Use Writesonic AI to Write Blog Posts
First, visit Writesonic’s website and log in. Straight away, you’ll notice that they claim to be the best AI writer for creating all types of content.
So far, most of the AI platforms that we’ve reviewed make similar claims and have similar functions. They can create Instagram captions, SEO content, blog posts, and much more.

So far, Writesonic has been the only AI platform that has offered a discount. If you decide Writesonice is the AI tool for you, click “Claim now” in the bar at the top of the homepage to access 50% off an annual plan.
We’ve been able to stick with the free plans offered for each AI review. So far, most of the platforms haven’t required credit card information for their free plans, except for Jasper, which does require credit card information to access their five-day free trial.
Next, click “Get started” in the upper-right-hand corner and enter your email to create an account. Once logged in, you’ll see callouts on the left-hand side of the screen, so let’s discuss those first.
Step 2: Discover Writesonic AI Blog Tools
When you click “Chatsonic,” a pop-up will explain how Chatsonic differs from ChatGPT. One thing that stands out is that Writesonic has voice-to-text, so you can talk into your phone rather than use a keyboard. Instead of having to find the perfect words to write down, you can talk things out. We think this is a really cool feature.

Photosonic, the option right above Chatsonic, is useful because you can type in an image description, and Writesonic will generate photos for you.
Rytr has a similar feature, but what’s great about Writesonic AI is the platform responds with multiple options when you give a description.
We tested the term “Airplane traveler,” and the platform came back with a variety of images, but they weren’t quite up to our standards.
Next, we tested the title of the blog post we’re using, hoping the more detailed description would lead to better image choices: “Top Three Must-Have Items for Every Traveler”.
If Writesonic’s images work for your content, hover over the images you want to use to download them.
Finding the right images to go with your content is so important. We really like that Writesonic offers photos from which you can get ideas in addition to just writing your outlines.
Quick Tip: Don’t be discouraged if you’re not happy with the images an AI platform offers. The images will still spark inspiration, so you can go back to your own photo library or stock images to find something more suitable.
Step 3: Choose your Blog Option
Now, let’s return to the main page and click “Articles and Blogs.” Here we looked at three options: AI Article Writer 4.0, AI Article Writer 3.0, and Paragraph Writer.

Note: The Paragraph Writer option was similar to a feature in Rytr, where you can select a sentence and then the AI will respond with a full paragraph. Although we didn’t thoroughly test out this function, we assume this option would be helpful if you already have an outline written for your blog.
Finally, we decided to select “AI Article Writer 4.0” to write a 3,000-word blog post. Keep in mind Writesonic AI’s free plan only allows 2,200 premium words.
Step 4: Use Blog Keywords
Now it is time to write the topic. We used the same title in every AI platform we tested:
“Top Three Must-Have Items for Every Traveler”
Once the title is entered, click “Search keyword.” Writesonic’s AI came back with an extensive list of keywords, including the search volume and keyword difficulty data. The latter gives Writesconic a leg up over the other platforms we reviewed.

Keyword Feature Notes:
- Stick to keywords with a difficulty score of less than 20.
- If you really want to go with a keyword that has a score of 20 or higher, you’ll have to pay for that keyword for it to rank well.
- The keyword list is sorted by volume, going from highest to lowest.
- The platform doesn’t have a function to sort the keyword list from lowest to highest score, which makes sorting through the keywords a bit more time-consuming.
Quick Tip: Learn more about the importance of keywords when strategizing your blog post.
From the extensive keyword list that Writesonic provided, we decided to go with “Travel Essentials for Women.” This keyword phrase has a keyword difficulty of six, a volume search score of 3,500, and a traffic score of 491. Since the keyword phrase has a low keyword difficulty score, high volume, and adequate traffic, this is a great choice.
Helpful definitions from Writesonic AI:
- Volume: an approximation of how often a particular keyword has been searched in the past month.
- Traffic: an estimation of the number of monthly visitors that the top-ranking website receives from organic search for a specific keyword. This is based on the number of searches for that keyword in the last month.
The way the keyword list is ordered, users select a keyword with the lowest difficulty score based on the highest search volume. Search volume is a helpful feature in Writesonic because it gives keywords and ample information about keyword searches.
Other AI platforms focused less on the keywords “travel essentials for women” and more on the keywords “top three must-have Items for every traveler,” so note that the outcome of the blogs will end up being a little different.
Step 5: Utilize the Blog Writing Features
Next, let’s take a look at five more features Writesonic offers:
- Tone of voice
- Point of view
- Call to action
- Language
- Number of blog variations

Tone of voice: The tone-of-voice feature is a common feature on AI platforms. However, Writesonic’s tone-of-voice feature is slightly limiting as users have to choose an option from a drop-down menu. In this example, we had an “informative” tone in mind, but that option wasn’t included in the drop-down list. Let’s go with “encouraging,” and hope it does the trick.
Point of view: We haven’t seen this option on the other AI editing platforms we reviewed.
Call to action: This is a great feature if you want to promote something at the end of your blog post, like an affiliate link, subscription, or webinar, for example. We’re going with “Sign up for an Interact account” and including a link to Interact’s website.
Language: Select the language for your blog based on who you are writing for.
Variations: Under the “language” option, you can choose the number of variations you’d like the AI to produce. We tested this feature in Rytr, but never looked at the second variation since the first one worked great.
Note: Because we selected only one variation, Writesonic came back with a singular title idea. Therefore we went back to increase the variation to four.
Step 6: Generate Your Blog
Now it’s time to click “Generate Ideas.” Writesonic AI came back with four great title options.
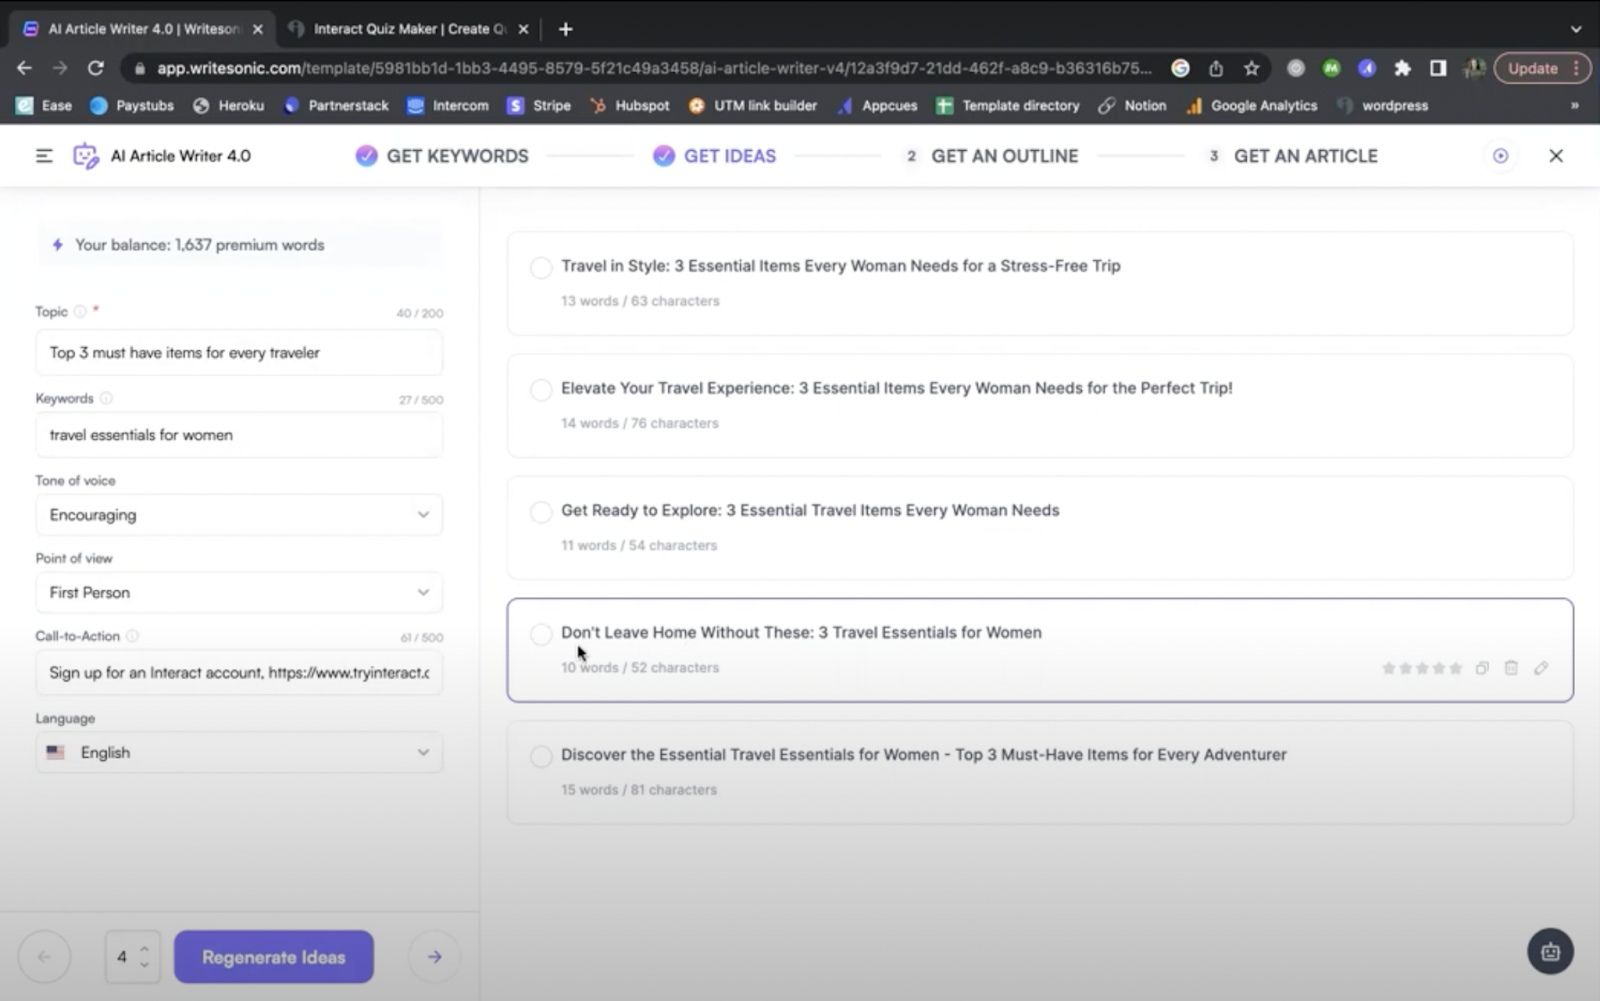
Let’s go with “Don’t Leave Home Without These: 3 Travel Essentials for Women”.
Before asking the AI to generate an outline, we’ll change the variation number to two.
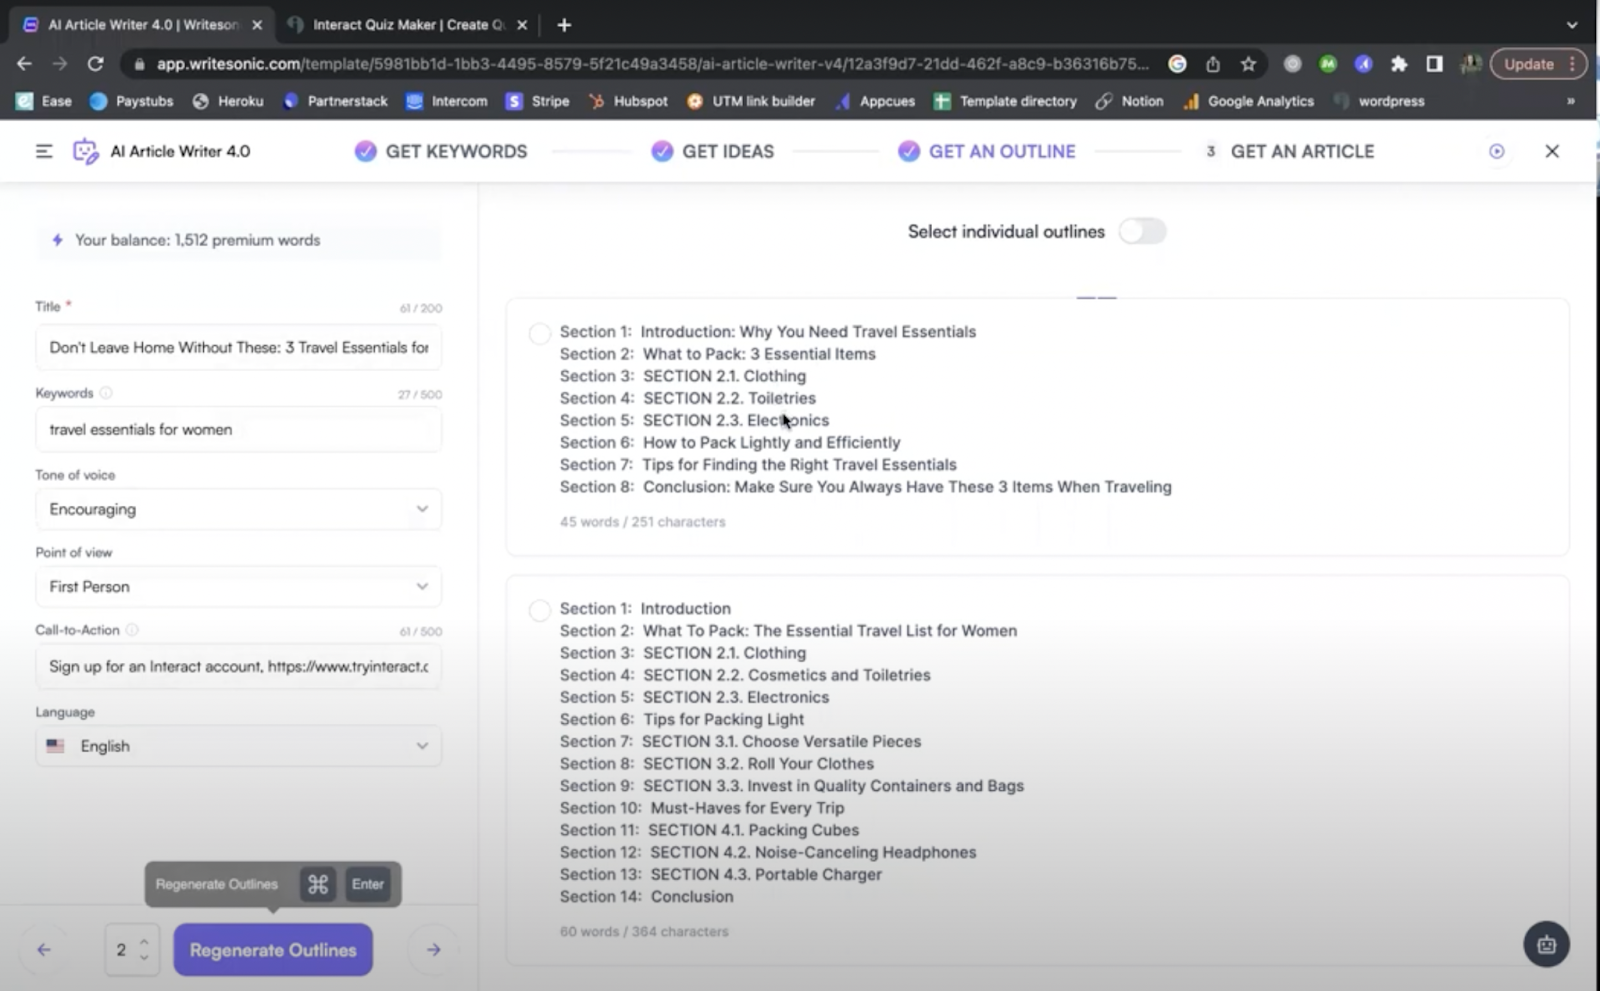
Writesonic AI came back with a number of options, including an introduction, several sub-sections based on the title she selected, and a conclusion. Writesonic was the only AI platform to produce more than five sections.
Using prompt requests, the other AI platforms only asked for an introduction, three main points, and a conclusion. The three main points were typically the three essential items you should pack.
Writsonic’s additional sections can help enhance a blog’s basic outline.
We’ll select the shorter option, which includes eight sections, to keep it simple. Next, we’re redirected to “Get an article.”
Once Writesonic generates an outline for you, the first step is to read through the sections. You can delete sections or rearrange them using the drag-and-drop feature.
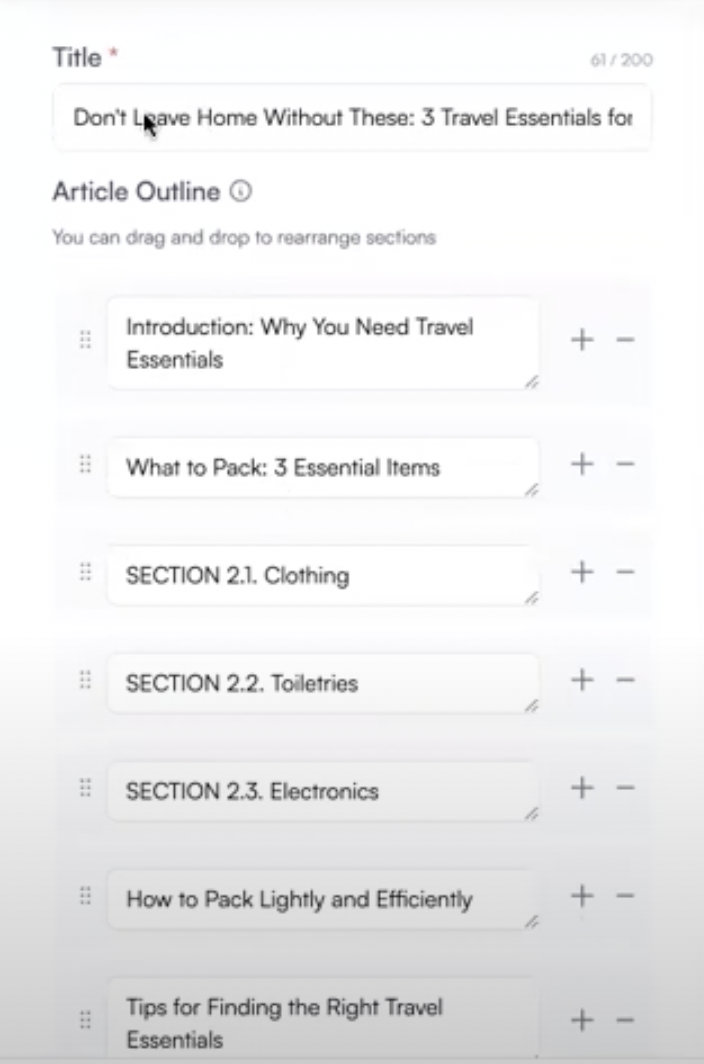
We deleted the section titled “How to Pack Lightly and Efficiently.”
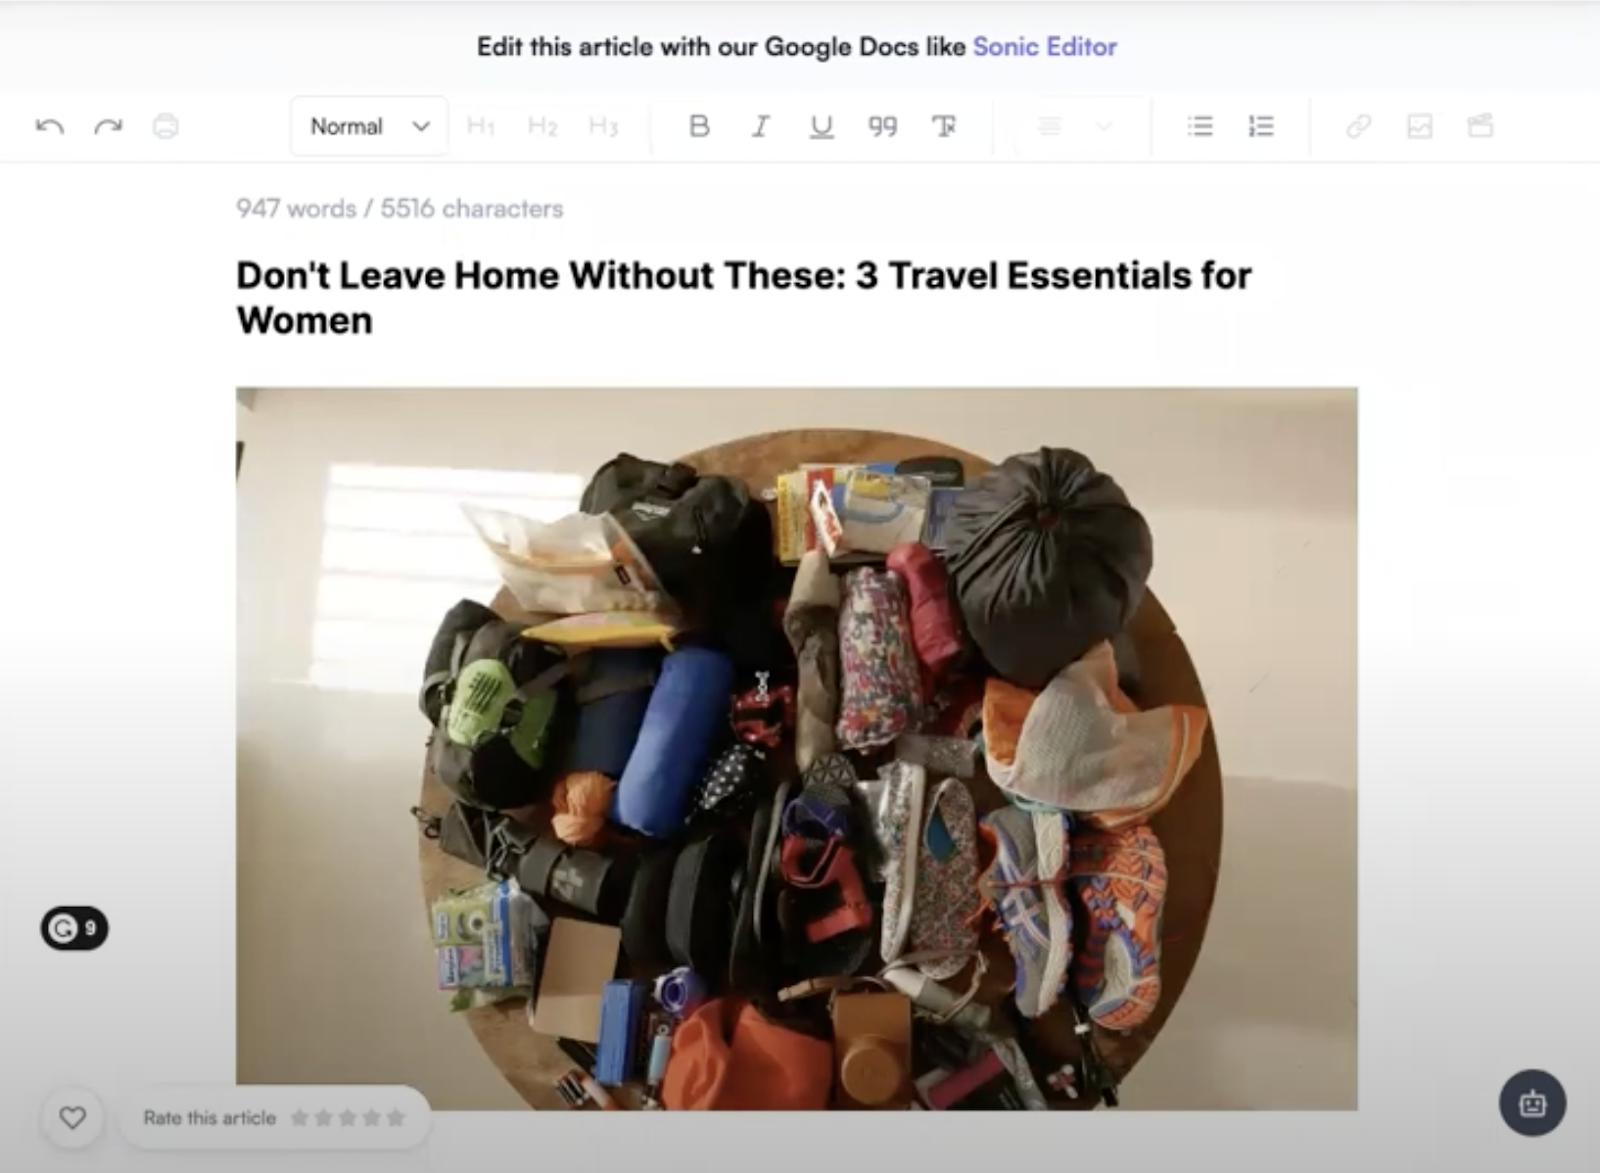
After clicking “Generate article,” the title is already formatted, and Writesonic AI gave credit to the owner of the picture. So far, Writesonic has been the only AI editing platform to automatically include an image in the blog post, without the user specifically requesting one.
Pros and Cons of the Writesonic Blog:
Pros
- A pre-introduction paragraph explains what the blog will touch
- Grammarly plug-in add-on
- Addresses why you want to pack certain items, why you need travel essentials, the travel essentials themselves, and what to pack
- Ability to change formatting directly in the platform
Note: These were common features across the other AI platforms.
Cons
- There isn’t an option to regenerate blog sections, so if you don’t like one paragraph, you’ll have to regenerate the entire article.
Because we signed up for a free plan, there weren’t enough credits to regenerate the article. Since there is no option to regenerate individual sections, be prepared to revise parts of the blog manually.
Step 7: Edit Your Blog

The free plan does not give access to the “Sonic editor” feature once you’re at this stage. To regenerate the entire blog, you have to rebuild the outline.
Final Thoughts on using Writesonic AI to Write Your Blog Posts
Writesonic is a good option if you’re focused on images within your blog. There’s more functionality to play around with suitable images, but you may find more unique options elsewhere.
Compared to other AI platforms we reviewed, Writesonic AI is limited. When you use Writesonic AI to write blog posts, it caps the number of words you can generate on the free plan and how much content you can regenerate. While regenerating content is possible, it adds more work to the process since you have to reconstruct the outline.
On a positive note, Writesonic AI has a lot of cool image features and the content produced was accurate and the quality matched our standards.
Using WriteSonic AI to write blog posts will save you a ton of time in structuring and filling the outline with solid content. The platform can also produce a number of variations, which presents the opportunity for new ideas.
All the AI editing platforms we reviewed have succeeded in writing blog content, but some allow for more flexibility and creativity. This is important if you really want to own the content you put out.