
Anyword is an excellent option for writing blog posts—however, you may come across a few kinks along the way. In this installment of Interact’s instructional series for using AI to write and repurpose content, we will take you step-by-step through writing a blog post with Anyword.
Check out Jackie from Interact’s other AI platform reviews with ChatGPT, Lumen5, Jasper, WriteSonic, and Rytr to see how they all compare.
Let’s get started!
Table of contents
- Step 1: Preparing to Write the Blog with Anyword AI
- Step 2: Adding Your Description
- Step 3: SEO Keywords for Your Blog Post written by Anyword AI
- Step 4: Generating Titles
- Step 5: Intro Paragraph
- Step 6: Explaining Your Main Points
- Step 7: Conclusion Paragraph
- Final Thoughts on using Anyword AI to Write a Blog Post
Step 1: Preparing to Write the Blog with Anyword AI
The first step to using Anyword AI to write blog posts is logging into the website and inserting your credentials and necessary information. Then, go ahead and click “Sign up with Google.”
Note: Anyword’s log-in process was a tad shorter than Jasper’s.
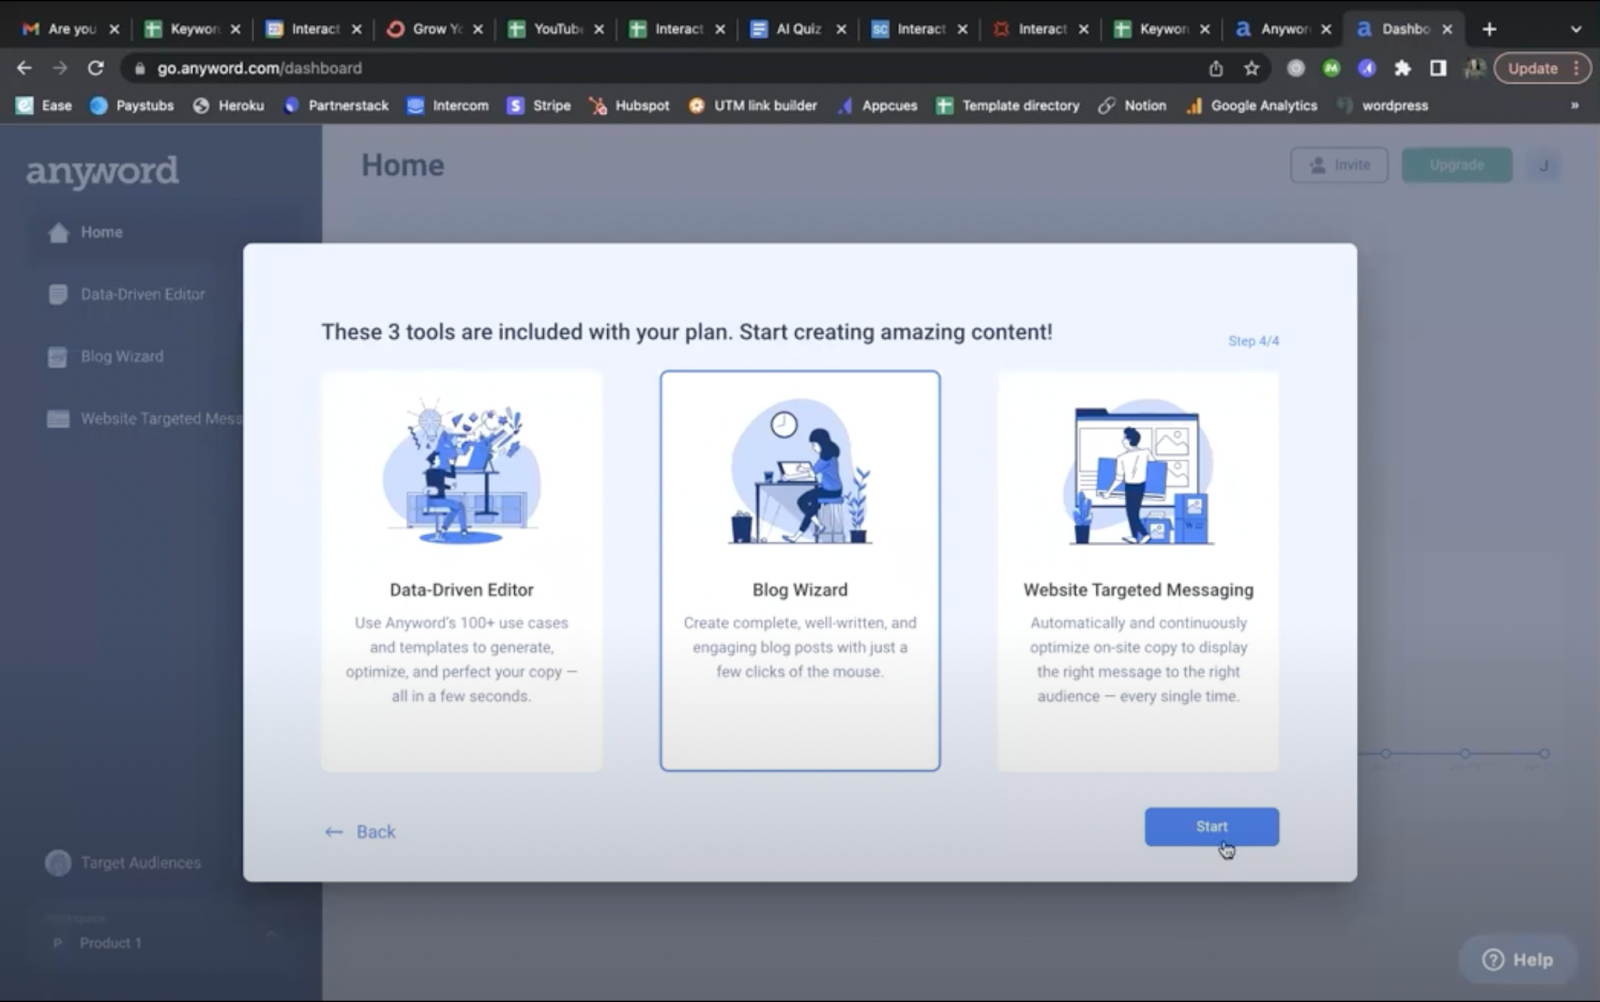
The Data-Driven Editor, Blog Wizard, and Website Targeted Messaging are all included in the free plan. Let’s select “Blog Wizard” today because we are writing a blog.
Quick notes before we dive in:
- ChatGPT has so far been our favorite in terms of content
- All the platforms have been compared based on free accounts
So far, Anyword gives specific fields that speak to the prompt you want to use, similar to Jasper. In ChatGPT, you have to type the AI prompt on your own, using precise language to get the exact results you want.
Jasper and Anyword take users through each section, so users know what to ask. You’ll want this feature if you’re new to AI and unsure what to input into each prompt.
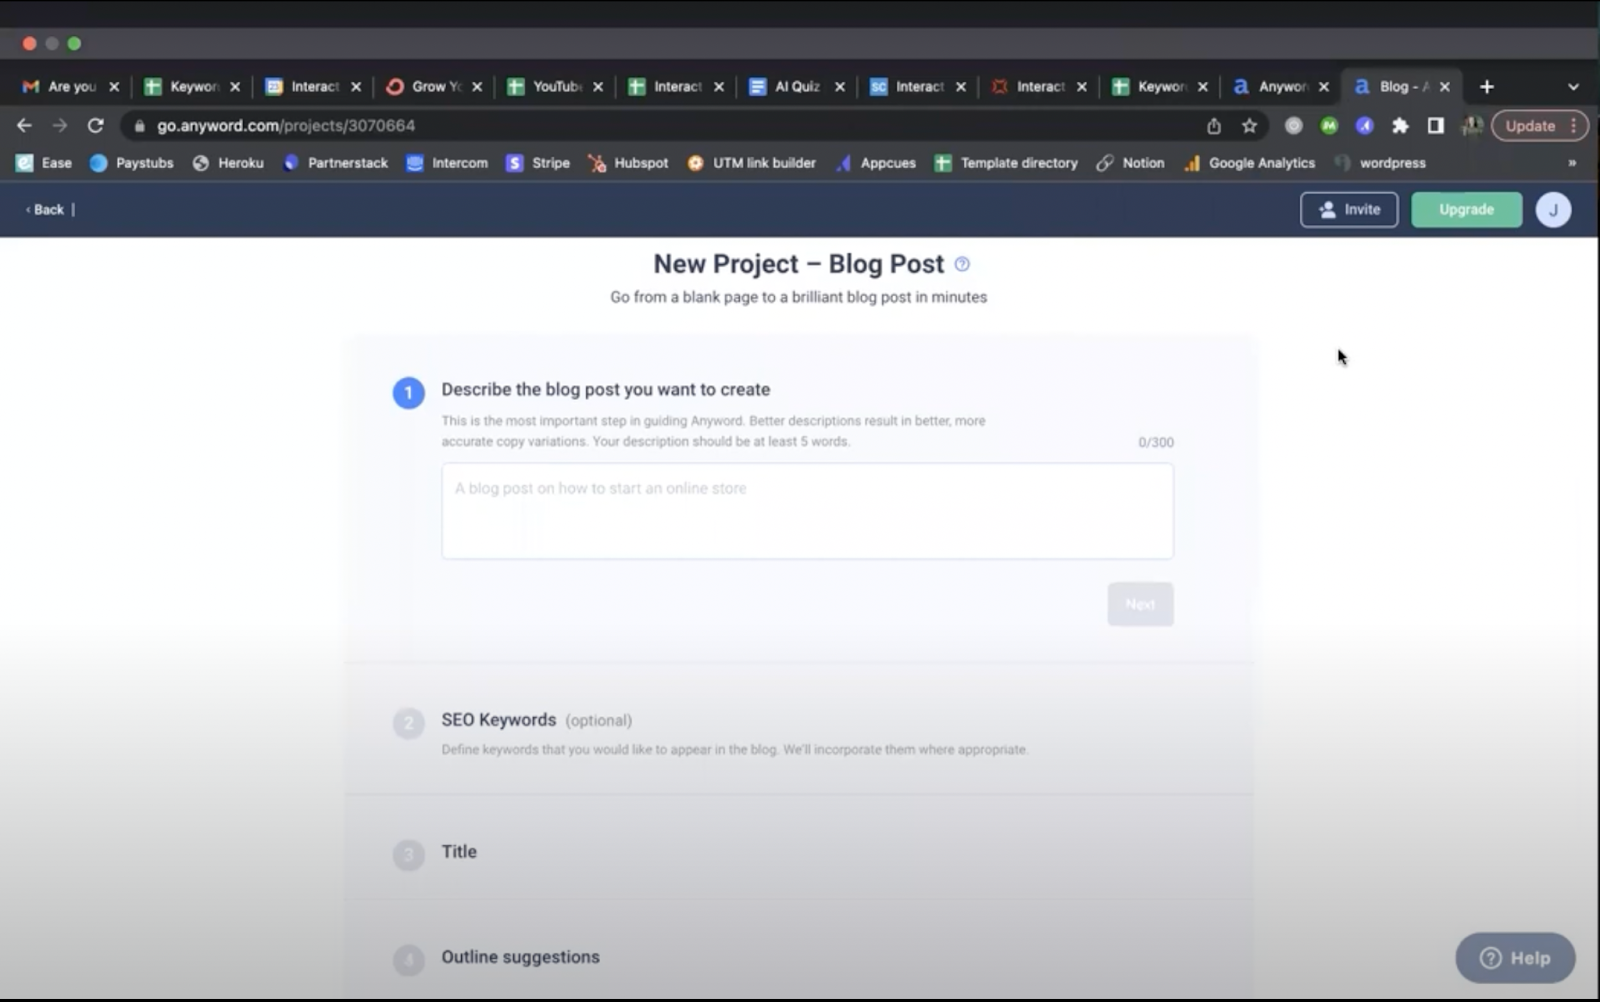
Step 2: Adding Your Description
The next step is to add content to all the different fields. In Anyword, users are limited to three hundred characters. In Jasper, users can use up to eight hundred characters.
For this review, we’re using the same blog title we used in the Jasper and ChatGPT videos.
- Blog title: “Top 3 must-have items for every traveler.”
We used the below description in Anyword:
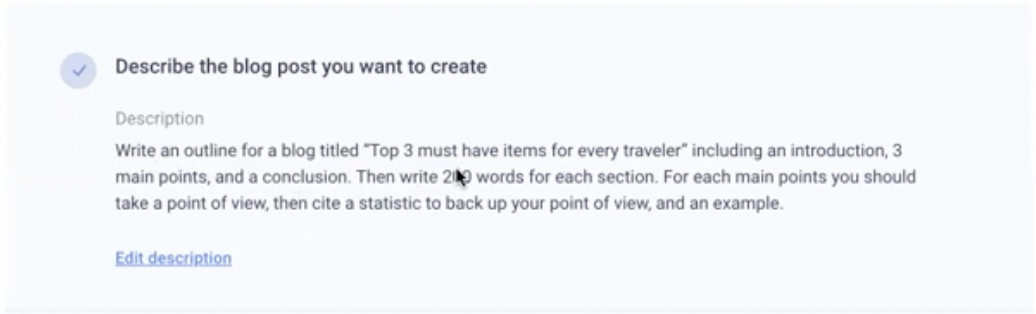
However, the description content seen in this post is from ChatGPT. We wanted to be consistent with the different AI platforms.
Step 3: SEO Keywords for Your Blog Post written by Anyword AI
Next is the SEO keyword section, which you’ll want to use to optimize keyword searches. For today’s purpose, we made up SEO keywords focusing on must-have items for every traveler: “packing lists,” “what to pack,” and “what to take on a trip.”
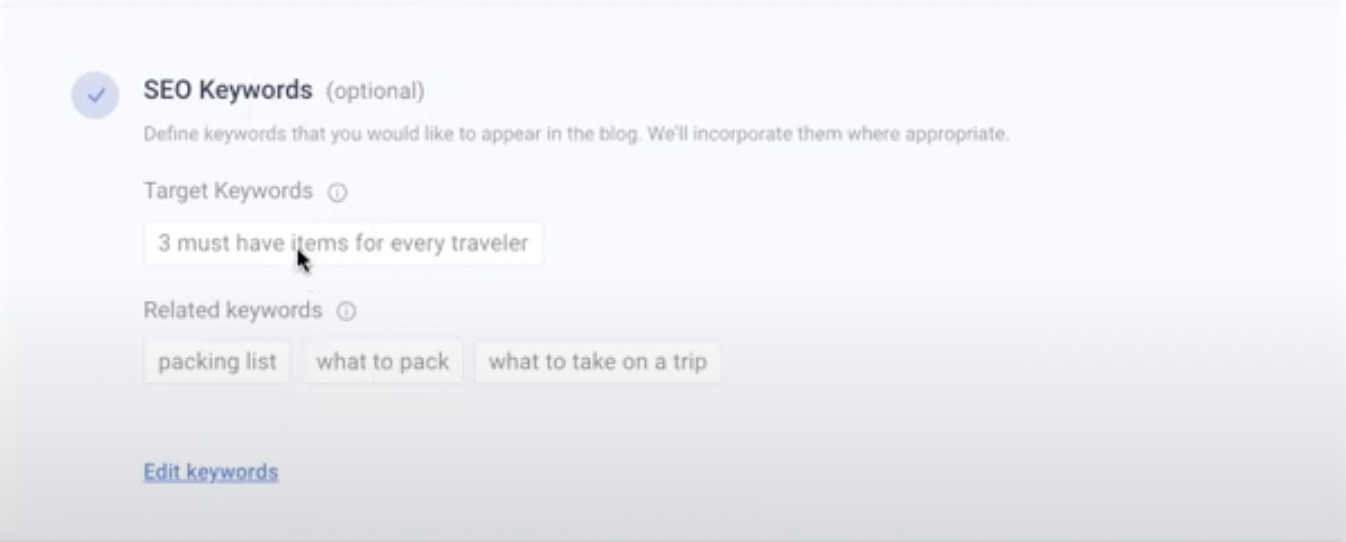
While we made up keywords for this example, you should set aside some time to research your own keywords to get the most out of this section. When you put thought into your keywords, the right people will find your blog posts easier, and your posts will gain more traction.
Step 4: Generating Titles
Now it’s time to generate engaging titles. Anyword generated the three titles shown below, but you have the option to create your own.
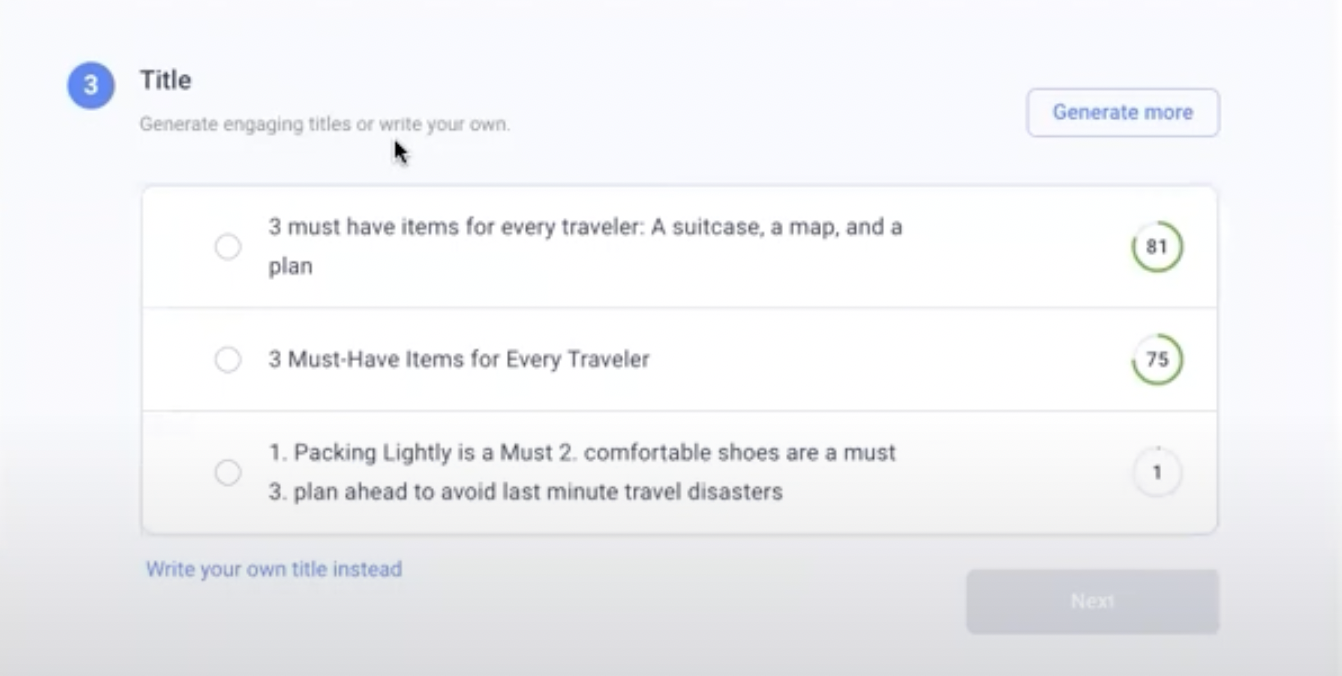
Anyword shows how the AI-generated titles rank on the right-hand side. If you hover over the green circle, you’ll see the score broken down by demographics.
Make sure you’re happy with how a title ranks before you select it. And, of course, avoid choosing a title with a low ranking.
After you select a title, click “Next,” and the AI will generate an outline. In this example, we selected the first title, and the AI came back with the below outline to use in her post:
- A suitcase
- A map
- A plan
We liked that one of the things Anyword came back with was “a plan.” It’s a little more interesting than what Jasper and ChatGPT came back with, which were only physical items to bring on a trip.
However, when we selected “Get more suggestions,” Anyword didn’t actually follow through. Both Jasper and ChatGPT, though, provided new options upon her request.
Step 5: Intro Paragraph
Next, we’re ready to use Anyword AI to write a blog post! Let’s generate an introduction. Anyword gives a few options, and the scores for all three paragraphs were relatively high and about the same.
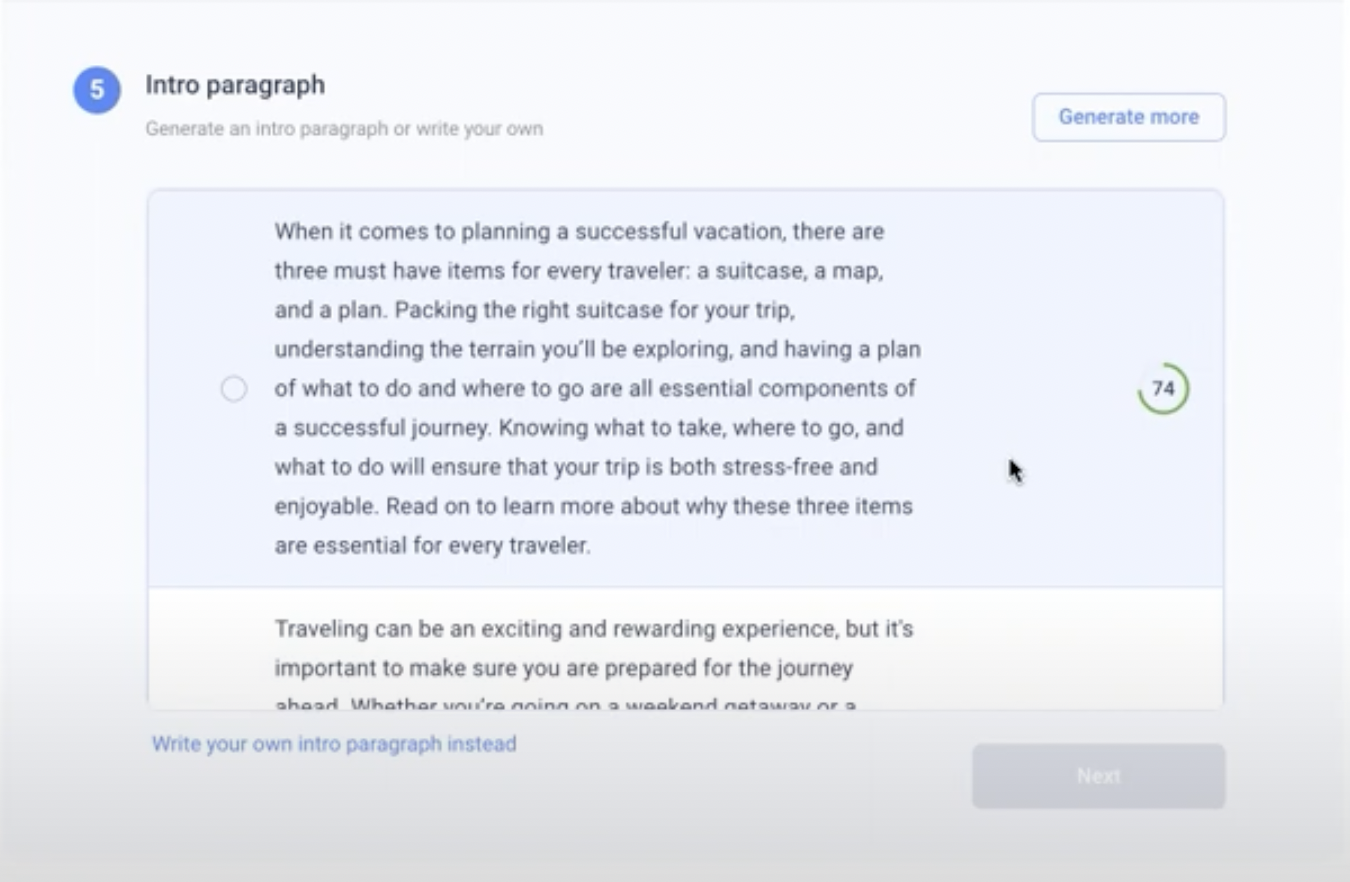
Introductions from ChatGPT, Jasper, and Anyword essentially all said the same thing: traveling is exciting, but you don’t want to leave without must-have items. Each introduction option included the three items from the outline and made clear that the blog would continue to go into detail.
Typically, you should pick the introduction with the highest score, and then hit “Next” to generate your introduction paragraph.
Afterward, you’ll continue to the “Editor.”
Step 6: Explaining Your Main Points
While Anyword generates a title, introduction, and three main points, it doesn’t automatically write or expand on them without further prompts. Users need to go into each main point separately to write more prompts to get body content for each outline point.

To do this, type your prompts in the boxes titled “AI Instruction” on the right-hand side of each point. For example, we gave the below prompt, keeping it similar to the prompts she used on the other platforms.
“Take a point of view on why a suitcase is essential for travel, then cite a statistic to back up your point of view, and an example to illustrate.”
Don’t forget to swap out the language for each point!
Click “Generate the paragraph,” and the box will fill with content.
If you find yourself struggling to generate content, you can use ChatGPT to generate content ideas!
Before we get into the AI-generated content, let’s discuss the differences between each AI platform during this step.
Jasper:
- The blog was filled in all at once when prompted to do so.
- Jackie only needed one prompt to get all the information.
ChatGPT:
- Users ask AI to write an outline,
- Then users ask AI to fill in that outline.
Anyword:
- AI creates an outline.
- Users prompt AI in each section to generate content.
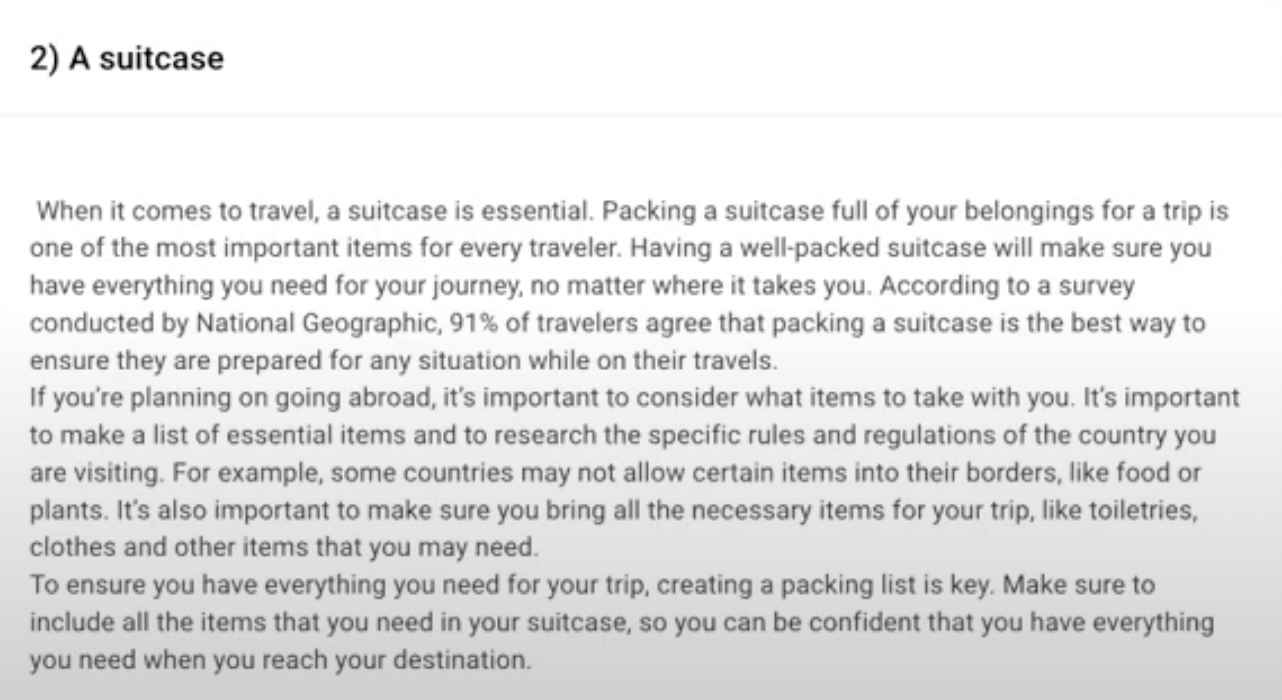
Okay, now back to the content Anyword’s AI came up with for “suitcase.” It’s not quite what we were looking for. The AI wrote content about what to pack in a suitcase, whereas we were looking more for content about actual suitcases.
So, the next step is to go back to the “AI Instructions” box to the right of the paragraph and rewrite the prompt. Here we rewrote it to say, “Take a point of view on why a suitcase is essential for travel, the best type of suitcase to use, then cite a statistic to back up your point of view, and an example to illustrate.”
Once again, click “Generate.”
Quick tip: There is a Grammarly integration, which is great for correcting grammar and polishing the content.
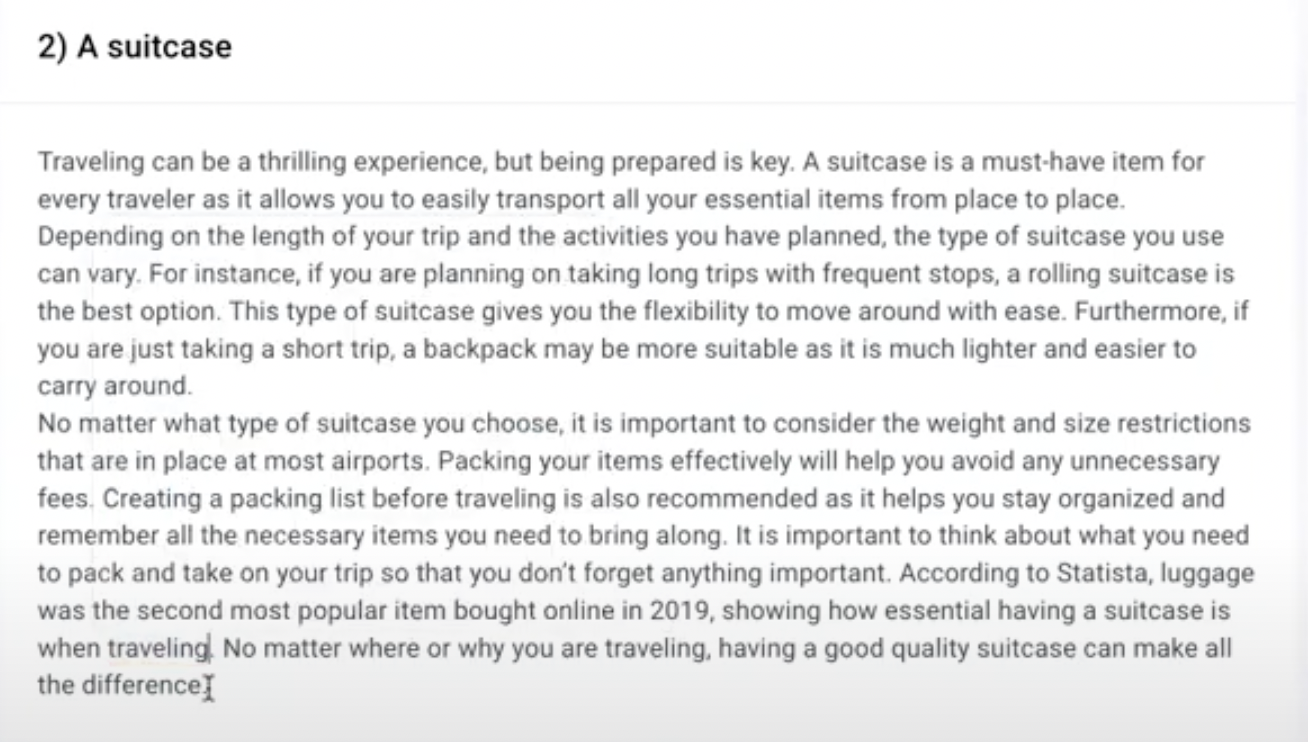
The refined prompt generated much better content in terms of the blog we were writing. When we asked for a statistic, the one Anyword used was what we were looking for.
Step 7: Conclusion Paragraph
After asking the generator to write an introduction and conclusion, it only wrote the introduction paragraph. To get the conclusion, we went back and added another point titled “Conclusion” and typed in a prompt for the generator.
Final Thoughts on using Anyword AI to Write a Blog Post
If you work well following an outline but still want to create some content yourself, use Anyword to generate an outline—-just make sure to use specific targeted keywords, as noted in Step 3.
If you want a platform’s AI to generate an entire blog post in one step automatically, then use a tool like Jasper or ChatGPT.