So you want to launch your first quiz…
Although it may feel like you’re embarking on a new journey, it may help to know that thousands of other quiz creators have gone before you AND have generated some pretty amazing results.
We’ve seen people in our Interact community generate five, six, and even SEVEN-FIGURE profit from their quiz. (Check out some of these case studies here.)
Quizzes aren’t just for telling people what Disney princess or Friends character they resemble.
When you use them to grow your business, they can help you generate higher quality leads in way less time and make product sales on autopilot. All you need to do is set it up once and the quiz will run completely on its own, no hand-holding required.
See? Buzzfeed’s got nothing on you!
You can accomplish WAY cooler things with your quiz than a typical Buzzfeed quiz can, and we’ll show you exactly how in this article.
Now it’s your turn to launch your first quiz.
Step-by-step guide to help you launch your first quiz
Don’t worry about figuring out what needs to go into your quiz and how to set it up. We’re here to walk you through every step of the process. It’ll be so easy, you’ll wonder why you didn’t get started sooner!
The best way to create your first quiz is to get inside the Interact platform and play around with our easy-to-use tool. When you finish each section of this article, you can go back to the quiz you’re building and complete each step. Then, at the end of this article, you’ll also be ready to launch your first quiz!
Sign up for your Interact account now and follow along!
Creating your quiz content
The first step to creating your first personality quiz is to think about what content you want to put inside the quiz. You might think that the next logical step is to brainstorm a list of questions and answers… but hold up! That doesn’t come in until later.
If you follow the exact order of these next few quiz content creation, you’ll find it so much easier to create your quiz. Trust us!
Define your quiz strategy
Many content creators start by asking themselves what kind of quiz they want to create, but before you can answer that question, you need to answer a more important one. It’s hard to figure out what your quiz should be about if you don’t understand what you want it to do.
What is your main motivation for creating a quiz?
What do you want it to accomplish for your online business?
Having goals in mind before you create your quiz content is essential to its success. By doing this, you’ll save yourself from choosing a quiz topic that doesn’t correlate with your brand or fit within your niche.
IMPORTANT: Take a moment to write down what your quiz goals are.
If you write down multiple goals, try to rank them in order of priority. This way, you’ll know exactly which goals are most important.
In this stage, it might be helpful to pull inspiration from other Interact users.
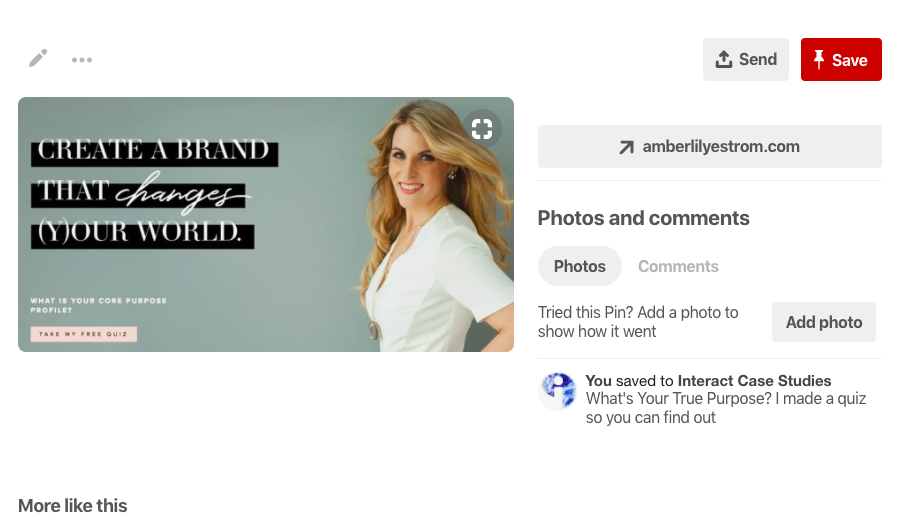
Amber Lilyestrom created her What’s Your Core Purpose? quiz to not only build her email list but to convert subscribers into buyers with her Brand + Biz Academy sales pitch. After launching her first quiz, she was able to grow her email list by over 4,000 subscribers and is now a seven-figure entrepreneur with a home-based business.

Amber isn’t the only one making a splash with her quiz.
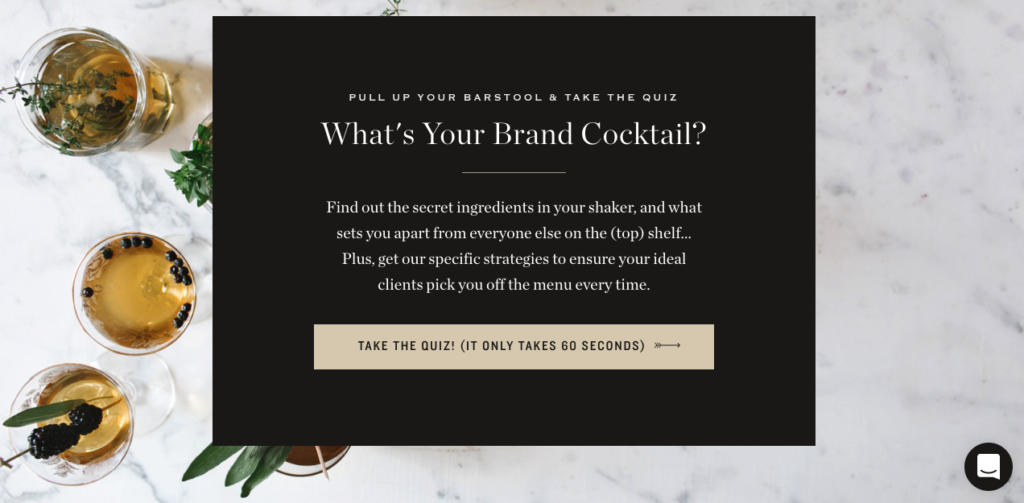
Jen and Jeff at TONIC Site Shop wanted to use their What’s Your Brand Cocktail? quiz to sell more customizable website templates but in a way that felt true to their funky and fun brand. With a 78% view to lead conversion rate, they’ve generated over $50,000 of digital product revenue JUST from the quiz.
While these quiz creators saw results that made them do a double-take, they ALL started with goals in mind.
Do you want to sell more online courses with your quiz?
Maybe you want to attract hundreds of quality leads that are interested in becoming freelance clients, or you might want to focus on building a bigger email list so you can increase your affiliate marketing revenue.
And, now that you’re thinking about it, a quiz could be a great fit for that membership site idea you’ve been sitting on…
No matter which goal you choose, it will determine how you structure and use your quiz. Every decision you make from here on out will be done in light of what you’re trying to accomplish.
Do you feel smarter already? Good!
With your winning quiz strategy and goals in mind, let’s tackle the next step.
Decide on a quiz topic and title
This part may seem tricky, but once you understand what your goals are, you’ll be able to brainstorm more quiz topics. If you need some extra help, here’s a list of 101 quiz ideas you can customize for your own brand.
When choosing a quiz topic, you’ll want to make sure it:
- Effortlessly fits within your niche
- Solidifies your expertise in a relevant topic
- Covers a topic your audience cares deeply about
- Is unique and stands out amongst your competitors
- Is clear and easy to understand so quiz takers know what to expect
Not sure how your quiz topic is going to perform? For extra peace-of-mind, you might want to validate your topic before creating the quiz.
You can do this by surveying your social media, blog, or email audience on what they’d be interested in learning about.
A simple poll can do the trick! (Did you know you can create polls inside Interact? Sign up here to get started with polls!)
Your quiz topic may depend on your industry and what you’re planning to sell at the end of your quiz lead generation funnel. By showing you examples of other quiz creators who’ve used simple yet unique quiz topics, it might help you think about your own.
As a business coach, Teresa White created a quiz to help her audience easily determine what kind of coaching is right for them. This is a smart move since her main goal is to generate more client leads for her business.
Tianna Tye uses her What’s Your Enneagram Leadership Type? quiz to collect interest for her Dream Hire Bootcamp which helps entrepreneurs find their next dream employee. Her quiz positions her as the expert while making quiz takers feel like the empowered leaders they are before they are added to her waitlist.
Okay, all of that sounds cool, but how do you make your quiz stand out from other quizzes that already exist on a similar topic? Take these two quiz examples from Becca Campbell of Little Z’s Sleep and Brittney Stephanic.
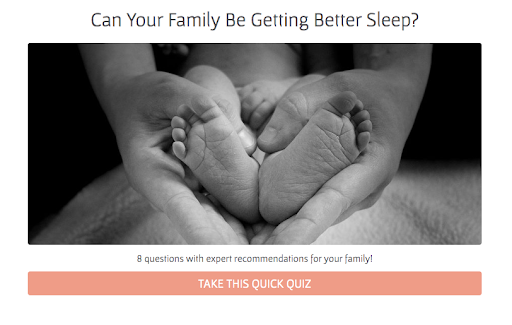
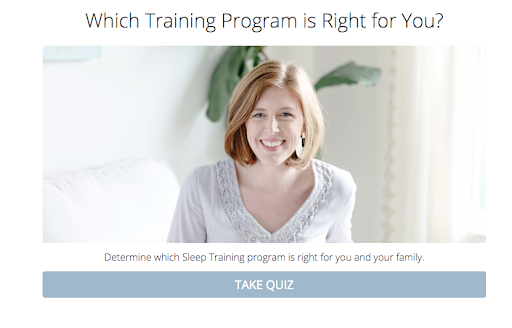
Both quiz creators are sleep consultants, but Becca chose to use her quiz to help visitors determine what program was the best fit for them while Brittney wanted to focus on giving expert recommendations to each quiz result.
Even in this narrow niche, both quiz creators found a way to create totally unique quiz topics!
Once you have a quiz topic, creating a quiz title will be a breeze.
IMPORTANT: While it may seem nice to add a dose of cleverness and personality to your title, it’s more important for it to be clear and concise. Your quiz title should be engaging while setting expectations for what kind of quiz result your audience will walk away with.
Ready to put your quiz title into the Interact platform? Let’s get this show on the road!
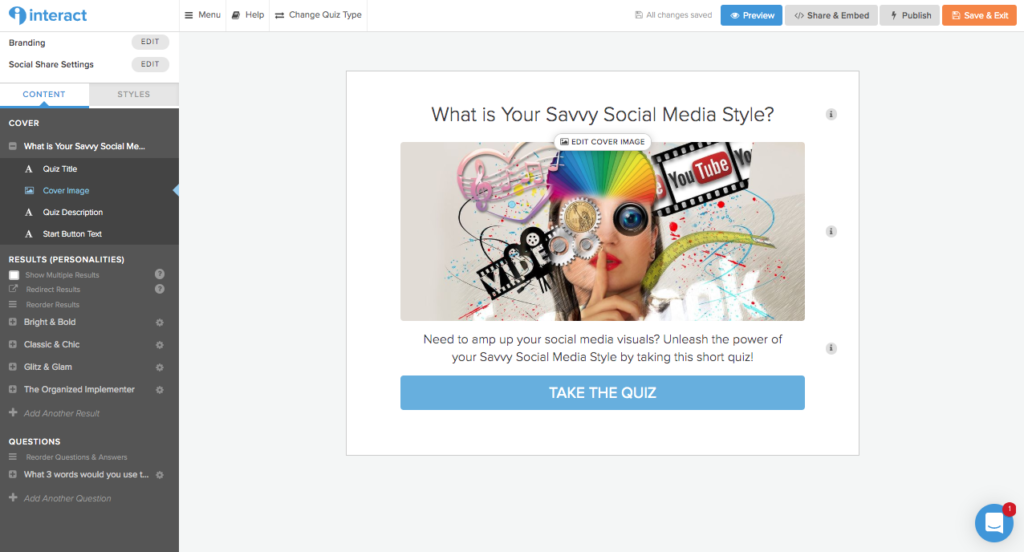
We’ll be using a social media themed quiz as an example, but you can complete all of these steps inside your Interact account.
- Click on the “Cover” link after locating the bigger “Content” tab on the left-hand side.
- Copy and paste your quiz title into the corresponding text box.
- Choose a stock photo or upload your own imagery to the quiz cover page.
- Copy and paste a short one to two sentence description underneath the image that sets expectations for the quiz and lets your audience know what they will walk away knowing.
- Customize the call-to-action (CTA) button copy. (If you aren’t sure what to put, “Take the Quiz” is clear and concise. Feel free to use it on your quiz!)
As you’ve been thinking about your quiz title, you might have an idea of what personality results you could use in your quiz. This is a great sign!
Hold onto that inspiration for the next section.
Create personality results for your quiz
Your quiz title and topic might be responsible for your quiz’s first impression, but your personality results will be the thing that creates a lasting impression. They must be written in a way that enhances your audience’s self-discovery process.
People love to read more about themselves, especially when it is positive and focuses on their strengths. (Hello, look at the popularity of StrengthsFinder!) The more you can help them learn about how they’re wired, the more they will trust what you have to say.
When you think about what quiz results you want to use, think about how you might want to segment your audience based on your ideal customer personas.
You can group quiz takers in any one of these core categories:
- Interest in a specific topic
- Skill level (beginner, intermediate, advanced)
- Type of industry they’re in
- Common personality traits
- Ways that they approach your topic
IMPORTANT: Try to write three to five personality results for your quiz. Any more and it could feel overwhelming for you and your audience. Any less and it might make your audience feel like they are all the same.
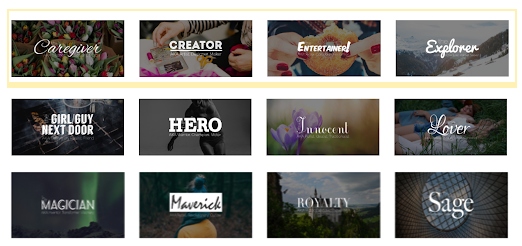
What happens if you choose too many personality results? Even though Kaye Putnam’s quiz has been very successful, she now regrets choosing 12 archetype results for her quiz. She didn’t realize how much extra work she’d have until she was already too deep into the process.
For each of the personality results, we recommend writing personality descriptions that are three to four sentences long. You may think that is short, but you have plenty of time to give your audience more information through your follow-up email sequence (which we will talk about much later in this article so hang tight!).
By keeping your personality descriptions to a short paragraph, you’ll be able to give your audience a quick taste of what their quiz result says about them before they go to their inbox for more information.
We love how Alex and Lauren of Create and Go created a quiz to help their audience of hopeful bloggers determine what kind of blog they should start. When they wrote the personality descriptions for each quiz result, they made sure every quiz taker walked away with an understanding of what kind of blog fits their bigger vision.
If someone gets the “Passion Blog” result, they’ll resonate with the personality description because it talks about the importance of staying true to their passion and blogging on what they love to talk about. It feels energizing, empowering, and fun!
Not only that, but Alex and Lauren also added that you don’t have to sacrifice your passion to make a big profit when they included an income range of what you can earn with a passion blog per month.
So much is accomplished with a small personality description.
Here’s another example from Rachel Harper, a visual branding and Showit website designer, who wrote her personality descriptions to share what style each audience member is most likely to gravitate toward.
By using positive adjectives, she’s able to create a personality description that would make anyone feel proud to get this result. Since purple is historically seen as the color of royalty, she created a custom moodboard that fits this vibe for this “Royalty” personality result.
After reading through the description, her audience gets even more excited to find out more by clicking the call-to-action (CTA) button for more information on their type. There’s no sales pitch in this personality description, which we recommend since you can sell your offering later in the follow-up emails you send once you’ve built up enough trust.
It’s tutorial time again!
Let’s put these personality result tips into action.
When you’re ready to put your personality descriptions into Interact, you’ll want to:
- Click on the “Results (Personalities)” tab in the left-side menu.
- Create a new personality by clicking the “+ Add Another Result” button at the bottom of the total personality results.
- Include the personality result title and full description, add a relevant stock photo or related image, and customize the CTA button.
- Repeat these steps for all three to five of your quiz results.
Now you need a way to guide quiz takers to their perfect quiz result.
That’s what we’ll accomplish next.
Write insightful quiz questions and answers
Now we’re ready to talk about creating your quiz questions and answers. Do you see how accomplishing the previous steps helps you create better questions and answers?
By reverse engineering the process, you’ll be able to write answers that fit each question but also directly tie into a personality result. When you set up the logic of your quiz, this will come in handy, but we have a few more steps before that comes in.
Let’s start by creating a list of questions that you can ask audience members.
Here are a few sample questions you can use to determine which result your quiz taker is:
- What three words would your family and friends use to describe you?
- In your friend group, you’re usually the one who…
- What do you want to be known for most?
- When you’re not [Blank], you can usually be found doing…
- What keeps you from learning more about [Blank]?
- You’ve tried [Blank] a few times, but you can never get past this stage…
- You know you could instantly improve [Blank] if you had…
- One of the best compliments someone could give you would be…
Try choosing a few questions from this list and coming up with a few of your own that relate with your quiz topic. Look at these live examples from virtually every niche if you need more inspiration on creating quiz questions.
Once you have a list of around seven to ten questions, it’s time to write your answers.
The number of answers you include usually depends on how many personality results you’ve chosen. If you have three possible quiz results, it helps to have three answers per question. That way, each answer will have a clear quiz result it ties into.
IMPORTANT: Have fun with writing your quiz! We love when quiz creators inject their personality into their quiz questions and answers. There’s no need to be stuffy or stiff. Let your brand voice shine through.
Copywriter Tarzan Kay’s 80’s pricing persona quiz helps her audience understand how they should price their offerings. From the very first question of her quiz, she clearly has personality. Instead of saying something generic like “I’m charging enough for my services,” she includes an option that says “I’m expensive but worth it dot com, baby.” She isn’t afraid to use slang (and an emoji) that fits with her theme and brand voice.
In a similar niche, The Copywriter Club created a What’s Your Copywriting Superpower? quiz to entice their visitors to play along and join their membership community. They took a really unique approach with this question on what style your writing would be if it were a type of cheese.
We can’t say we’ve seen a question quite like that before!
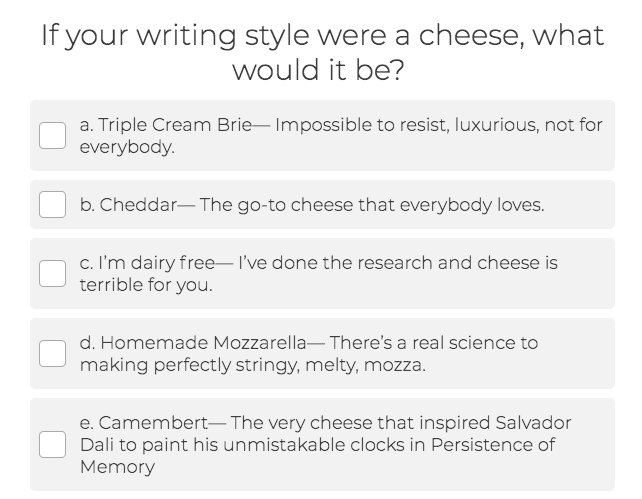
It’s even better when you consider how silly yet strategic many of the answers are.
These are two great examples of people who didn’t take themselves too seriously when creating their quiz. It’s totally paying off by helping them build their email list with delighted subscribers.
Just remember that you don’t have to force humor to create a great quiz. It’s like trying to make fetch happen… it just doesn’t work if it’s not a natural fit for your brand.
One writing technique you can try is to plainly write out the possible answers to each question and then go back to rewrite it in a more entertaining and memorable way.
For example, if you want your answer to say “I have been a business owner for 1 year” without feeling so dry, you could say “I’m one year in and not throwing in the towel!” or “I’ve been at it for one year and it’s been a roller coaster!”
With your quiz questions and answers all written out, you’re ready to put them into your Interact quiz. It’s under construction right now but you’ll be ready to launch it soon.
Only a few more steps to go!
For now, here’s how to put your questions and answers into Interact:
- Locate the “Questions” section on the left-side menu.
- Click the “+ Add Another Question” at the bottom of the section.
- Copy and paste the pre-written question you’ll be asking your audience.
- Copy and paste each answer into the possible answer boxes. Click the “+ Add Answer” button if you need to add more possible answers to your quiz.
- Include stock photos or thumbnail images to each answer (or to the bigger question) by clicking the “Edit” button at the top of each answer. You can search for images using the integrated social media library tool inside Interact.
- Click the blue “Edit Result Correlations” tab underneath the main navigation and right above the question and answers text box. Once you do, you’ll see a separate pop-up that allows you to connect each answer with its corresponding result.
- Click on the answer and then the personality result you would like to connect it to. Repeat this step until all of the answers contribute to a possible quiz result.
- Click the “Save” button at the bottom of this pop-up window to close it and go back to editing your questions and answers.
Then you can repeat steps two through eight until all of your questions and answers are in your Interact quiz. This should take you about five to ten minutes now that you have all of your content written. Putting it into Interact will be the easiest part of the process!
With all of your quiz-related content, let’s move into a fast and fun part of the quiz building process: customizing the visual branding of your first quiz.
Adding visual branding to your quiz
Get ready to exercise your creative freedom! There are a variety of design features and customizations you can choose from to create a one-of-a-kind interactive quiz.
It helps to have an idea of what your visual branding will be. This comes down to choosing a custom color palette, font styles and other types of typography, and any other graphic elements you’ll want to use consistently.
If you’re still in the process of figuring out what your visual branding guidelines should be, we’ll help you out with these next few sections.
Customize your colors and fonts
When you dig into the psychology behind color theory, you’ll find that certain colors evoke different emotions.
While orange gives a feeling of happiness, warmth, and joy, the color red inspires a completely different emotion even though it’s so close to orange on the color wheel. When someone sees red, they think of passion, urgency, and boldness.
IMPORTANT: You must choose your colors wisely when you create a custom color scheme for your brand. Remember to write down the HEX codes of each color you choose so you can create a consistent visual brand identity on all platforms, including your Interact quiz.
We recommend choosing two or three brand colors with one main pop of color. The pop of color can be used for CTA buttons and highlighted text while the other colors can create the rest of your design foundation.
If you aren’t sure which colors to choose for your color palette, it helps to look at moodboards for inspiration. Designers will often use moodboards to create an overall vibe or mood around each brand before they work on other graphic elements.
Take these two Salted Ink moodboards, for example.

The bottom moodboard feels soft and feminine with neutral hues, but the top moodboard looks bold, fancy, and fun with pops of color and gold accents.
If you need more color inspiration, look at these premade moodboards on Pinterest to help you determine which colors you and your audience commonly gravitate toward. To create your own brand moodboard, grab these free moodboard templates from Libby Co or Design Yep! to get started.
Do you have a few colors you want to use? Awesome!
Let’s put them into your Interact quiz. After you locate the “Styles” tab on the left-side menu or click the “Branding & Styling” box on the main menu, you’ll find multiple quiz design options you can customize. Let’s walk through each one.
First, adjust the background color of your quiz.
Then choose a font color that is highly contrasted with the background color. No one wants to squint when they try to read your text!
Next, choose a CTA button color that really stands out. Try to stray away from making it lighter or darker shade of your background color. You want it to really pop!
As you continue working through the rest of your design options, you’ll customize the color of your option font, selected option, and progress bar.
The next option is to customize your font.
Inside the Interact platform, you have nearly 700 fonts you can choose from, thanks to our integration with Google Fonts. You can also upload your own branded font if you don’t see it on the list.
There’s only one more step before you finalize the style of your quiz: uploading your logo.
Add your logo
Your logo is one of the most important elements of your visual brand identity. It helps your visual branding stay consistent from platform to platform while giving your audience a recognizable mark they can trust.
We all know the Nike swoosh, McDonald’s golden arches, and the “A to Z” arrow in Amazon’s logo. Your job is to create a memorable logo that will also connect your audience with your brand.
We recommend hiring a custom branding designer to help you create a logo, but if you are looking for a more budget-friendly option, you can also purchase premade logos on sites like Creative Market or Etsy. If you want to design your own logo for free, check out Canva.
When you’re ready to upload your logo to the quiz, click the “Edit Image” button underneath the header that says “Add Logo.” You’ll notice in the window pop-up that we recommend uploading a logo with a file size of 250 pixels by 150 pixels. Simply resize your logo in a design tool like Canva, PicMonkey, or Photoshop and upload it here.
Click “Choose File” and locate where your logo file is on your computer. Once you select it, you can press the blue “Upload Image” file so it is added to the bottom right of your quiz.
(For this example, we just used the Nike swoosh but you can add your logo with a transparent background to fit your own quiz.)
Now your quiz content and design are both done.
Doesn’t it feel good to check those tasks off of your list?
You might be wondering if it’s time to launch your first quiz yet. Well… not quite, but you’re almost there! Just a few more steps and you’ll be ready to publish it on your website.
Integrate your quiz with your email marketing strategy
To make sure you are getting the most out of your quiz, let’s talk about how it relates to your email marketing strategy and why you should think about using a quiz to build your email list.
Write email opt-in copy for your quiz
As a quiz taker answers each of your questions, they are getting closer to receiving their personalized quiz result. Their anticipation increases with each question, and you want to take advantage of how engaged they are with your quiz.
Right after they finish answering the last question of your quiz, our Interact form follows up with an option to sign up for your email list. This email opt-in copy is incredibly important because it is often the difference between a quiz taker becoming an email subscribers or not.
To turn a quiz taker into a loyal subscriber, you must:
- Let them know what to expect when they sign up for your list
- Share that they are just one step away from getting their quiz results
- Sweeten the deal by sharing something valuable with them
- Promise to send follow-up emails after they get their quiz results
This is what Gina of The Fitnessista did with her fitness personality quiz. She tells quiz takers that she will not only give them their quiz results but also send her personalized recommendations for at-home workouts if they sign up for her email list.
Another thing you might notice about her email opt-in form is that there is a faded gray button below her main CTA button that says “Skip this step.” You may be wondering why someone would want to include that on this form.
Again, this goes back to your goals.
Do you want to build a bigger email list and let people unsubscribe later? Then you can skip this button. If you’d rather build an email list of quality leads who really want to hear from you, then you can include the skip button for people who just want their results. We recommend the latter.
If you want to include the “Skip this step” button, make sure to check this top box in the second step of customizing your opt-in form inside Interact.
As another example, Lucy of Lucy Jo Home created an interior decorating quiz that includes a promise of what her new subscribers will receive when they sign up for her list. She also includes the “Skip this step” button so she can weed out the people who are only interested in knowing what their quiz personality type is.
Think you are up to the challenge of writing your own email opt-in form copy?
We thought so!
There’s not much to it. You can customize the copy we provide for you in the third section that says “Edit Form Content.” You might also want to change the CTA button copy to fit whatever next step is right for your new email subscribers.
When you hit the blue “Save and Continue” button at the bottom of this page, you’ll be taken to our Email Integration page to connect your email service provider (ESP) with Interact.
Connect your email service provider
Luckily for you, Interact connects with nearly all of the major email service providers on the market. When it comes down to choosing which ESP is the right fit for you, think about what your email marketing goals are.
Are you hoping to grow your email list on autopilot? Do you want to use lead magnets to build your list with interested buyers? Do you need your email marketing to be backed by a comprehensive CRM, or can you get away with using basic automation tools?
Each ESP offers something different, so we recommend testing them out with a free trial and reaching out to their customer service teams if you have questions about which one may be the right fit for you.
Many of our Interact users build their email lists using ConvertKit, Mailchimp, Drip, Infusionsoft, and ActiveCampaign, but we integrate with even more ESPs than those listed.
This is what the available integrations will look like after you finish your opt-in form.
For specific instructions on how to connect each ESP to your Interact quiz, click the corresponding link below:
Create triggers and actions
This is the most technical part of the quiz building process, so we’ll walk you through each step.
For each quiz result, you’ll see that it shows up as a Trigger. This means that whenever someone takes the quiz and gets that specific quiz result, it will automatically tell Interact and your email marketing system that a specific thing needs to happen. We call this the Action that follows the Trigger.
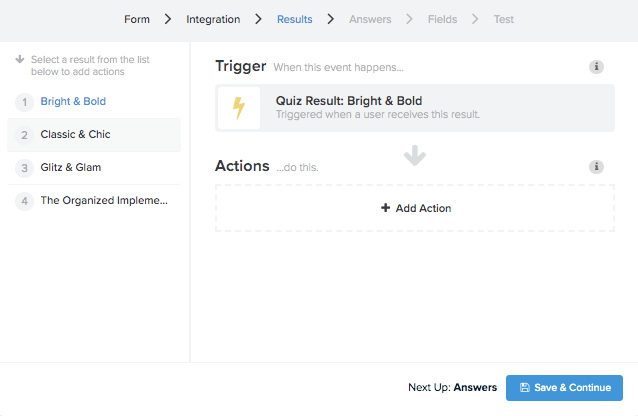
In this case, the Bright & Bold personality result can connect to a specific email sequence so it will automatically be sent to new subscribers that fall under this result after they take the quiz. (We’ll talk about how to write the email sequence next, but keep this in mind.)
This can be done by clicking the “+ Add Action” button and selecting the corresponding email sequence using the dropdown menu. Each personalized email sequence will need to be uploaded directly to your ESP in order for it to show up here.
(When you click on the dropdown menu, you will see that the “None selected” option will then show the name of the email sequence you have clicked on and chosen.)
Speaking of email sequences, let’s jump into that activity next.
Write a follow-up email sequence
Do you need a mental break from some of the technical instructions? That’s exactly what you’ll get when you start writing a follow-up email sequence.
Once someone signs up for your email list, you don’t want them to hear crickets.
That would be awkward.
Instead, you want to have a plan for how you will communicate with new subscribers after the quiz. Luckily, you won’t have to personally email each of them as they sign up. That would create WAY too much work for you.
Instead, you can use your ESP to automate the email delivery process by creating an email sequence. This refers to a series of emails that bring new subscribers through the buyer’s journey. When we talk about creating a quiz-related email sequence, it’s even simpler than most email sales funnels and welcome email sequences.
You don’t need anything fancy or elaborate. All you need is three to four simple yet personalized emails you can use to nurture your budding relationship with new subscribers.
This is what it can look like:
Here’s what can be included inside your follow-up email sequence:
- Email 1: Personal welcome and more information about their quiz personality type
- Email 2: Customized tips and resource recommendations based on their results
- Email 3: Either a personal story or past client story that acts as a case study
If you want to add another email and don’t have another email sales funnel you are connecting to these quiz email sequences, you can also pitch a relevant offering with a strong CTA. This is a great way to test if people are responding well to your product or service after the quiz.
Learn more about how to write these follow-up emails here with a helpful worksheet.
Take a peek at real examples of quiz follow-up email sequences.
After writing each short email, you can copy and paste them into your ESP. If you’re not sure how to do this, look into your ESP’s help section of their website for more information. They’ll have guides and resources available to you as well as a customer service team of people who can help.
Once all three (or four) of your emails are inside the backend of your ESP, it’s time to go back to the Trigger and Action window we talked about in the previous section and make sure each result that has a Trigger also has a custom Action that is related to the connected email.
When you’re done, you can click the blue “Save” button at the bottom.
Okay, the technical part is almost done.
All you have left to do is make sure the email addresses you’re collecting inside Interact corresponds with the right label in your ESP. If it looks something like this, you should be good to test the integration to see if it works properly in the last window.
You can also hit the blue “Preview” button in the top navigation to make sure your quiz looks and functions exactly how you want it to.
Now you’re ready for the final step: sharing your quiz with the world!
Publish and promote your first quiz
You’ve put so much work into your quiz and it’s going to pay off big time.
You’ve earned this celebratory moment!
Before we throw confetti into the air, check one more time to make sure everything works properly with your quiz. You can do this by hitting the “Preview” button and taking the quiz as if you are a visitor.
It probably feels like deja vu since you just completed this step, but do it again. It will give you a sense of ease to know that everything is working as it should.
Ahhh. It feels so good.
Then take one last look at our Launch Your First Quiz checklist to see if you’ve checked off all of these boxes.
If so, you’re ready to hit that big “Publish” button in the top navigation!
But you’re not done quite yet. Here’s what you want to do next.
Embed your quiz on your website
With your quiz officially published, it doesn’t really feel like a “thing” until other people can see it.
When you hit the “Publish” button, this window will automatically show up on your screen with various options to help you share and promote your quiz.
Let’s start with the option on the bottom left that says “Embed in your website or landing page.” This option will give you the necessary code and instructions to help you input the quiz directly on your website. You’ll also have formatting options to make sure it fits your website properly.
Here are our specific instructions to help you easily embed your quiz into any of the major website building platforms. We’ve got your back!
You can also grab the direct link to your quiz by clicking the “Get a direct link to your quiz” button in the promotion menu we share earlier. While we recommend embedding your quiz on a landing page (like this) so you can direct people to your own domain, you can use our TryInteract.com-based link when you need to.
In addition to embedding your quiz on your website’s homepage or landing page, there are few other places on your website where you can easily promote your quiz:
- in your blog’s sidebar with an image or link that takes readers directly to the quiz
- in the footer of your website
- in a blog post on a topic that is relevant to your first quiz
- in an announcement bar above your website navigation (tools like Hello Bar can help)
- in a timed pop-up on any page of your website (check in with your ESP to see if this functionality is available to you)
Your website is a great place to host your quiz, but let’s make sure people get there!
Share your quiz on social media
One of the best places to promote your quiz (once it lives on your website) is on your most frequented social media platforms!
If you have an active online presence on Instagram, Facebook, Twitter, Pinterest, YouTube, or any other platform, you can entice your followers to become email subscribers by sharing your quiz. This is a fantastic idea because you don’t want your followers to only hear from you on social media.
Social media algorithms are becoming unreliable and favor paid advertisers over people who are posting organic content. Not only that, but you also don’t “own” your social media presence. While it’s unlikely that a big social media platform will dissolve, it’s still possible.
You don’t want to spend all of your time building up your social media following only to see it go away or feel like you can’t reach your people any more. This doesn’t mean you should stop using social media but rather use it as one of your greatest tools to build your email list.
Since your email subscribers can be worth as much as 15 times more than social media followers, we’d say that creating a quiz to build your list is a pretty smart move.
Here are some ideas to help you promote your quiz on social media:
- Create graphics (using your visual branding guidelines) and post them on social media with a link to your quiz landing page
- Talk about your quiz in an Instagram story video
- Host a Facebook live where you talk about your quiz topic
- Tweet the link to your quiz on Twitter
- Create a YouTube video that promotes your quiz with a preview of it
- Add your quiz to your social media bio or Linktr.ee
- Experiment with Facebook ads and other paid advertising (view a case study here)

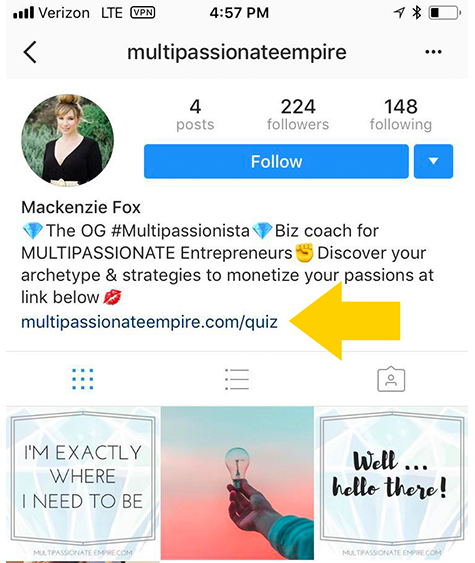
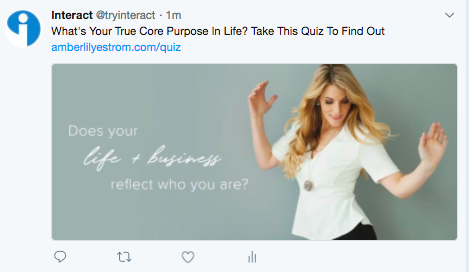
IMPORTANT: Don’t post about your quiz once and then never talk about it again. Many people won’t see your first announcement about launching the quiz. It’s important to regularly remind people of the quiz so they are more likely to take it.
Your list of social media followers most likely grows every month, so you’ll want to use this as motivation to tell them about your quiz. We recommend mentioning your quiz every few weeks after you talk about it a few times during your initial launch week. That way it stays top-of-mind without becoming overwhelming.
Also, you can vary the times you talk about your quiz. If you post about it on Facebook one week, you can talk about it on Instagram the next week. This variety will help your social media audiences see more of your posts without seeing the same content on every platform.
Now you have successfully launched your first quiz!
Since you are at the end of this article, you know how to:
- Create a winning quiz strategy and set growth-minded goals
- Choose a quiz topic and title your audience will love
- Write your quiz personalities in an engaging way
- Create quiz questions and answers that are inspired by your quiz results
- Fully customize the style and branding of your quiz inside Interact
- Write email opt-in form copy that helps visitors become new subscribers
- Choose an email service provider and integrate it with Interact
- Create triggers and actions that take care of the technical side of your quiz
- Write an email sequence that turns subscribers into brand advocates (and buyers!)
- Embed your quiz (once it is published) on your website and landing page
- Promote your quiz on social media so your followers can become subscribers
WHOA. That is a lot to tackle in such a short amount of time, but you did it.
We’re so proud of you!
Once you are done with your quiz, let us know. We love featuring the latest quizzes our Interact users are creating through our social media platforms and email list, and yours could be next!
